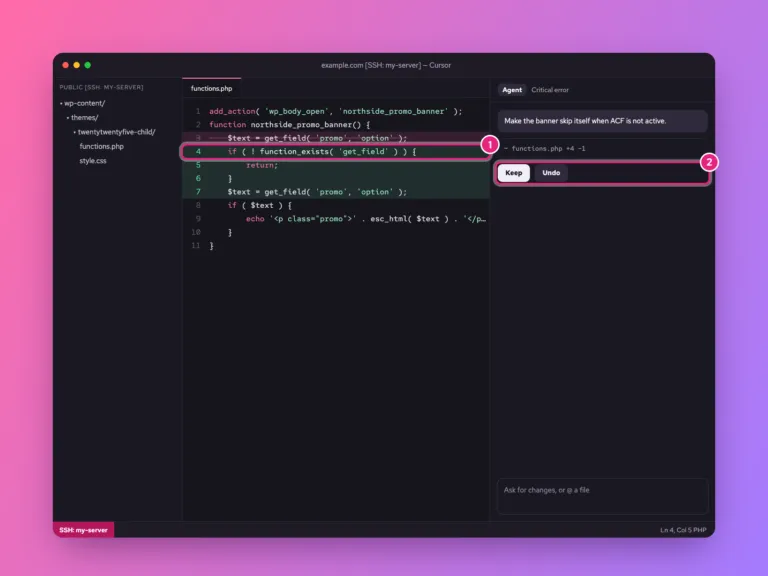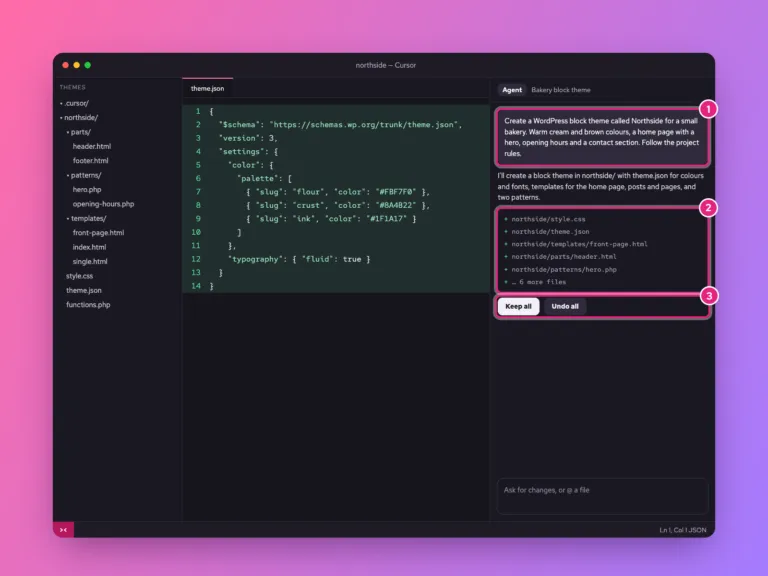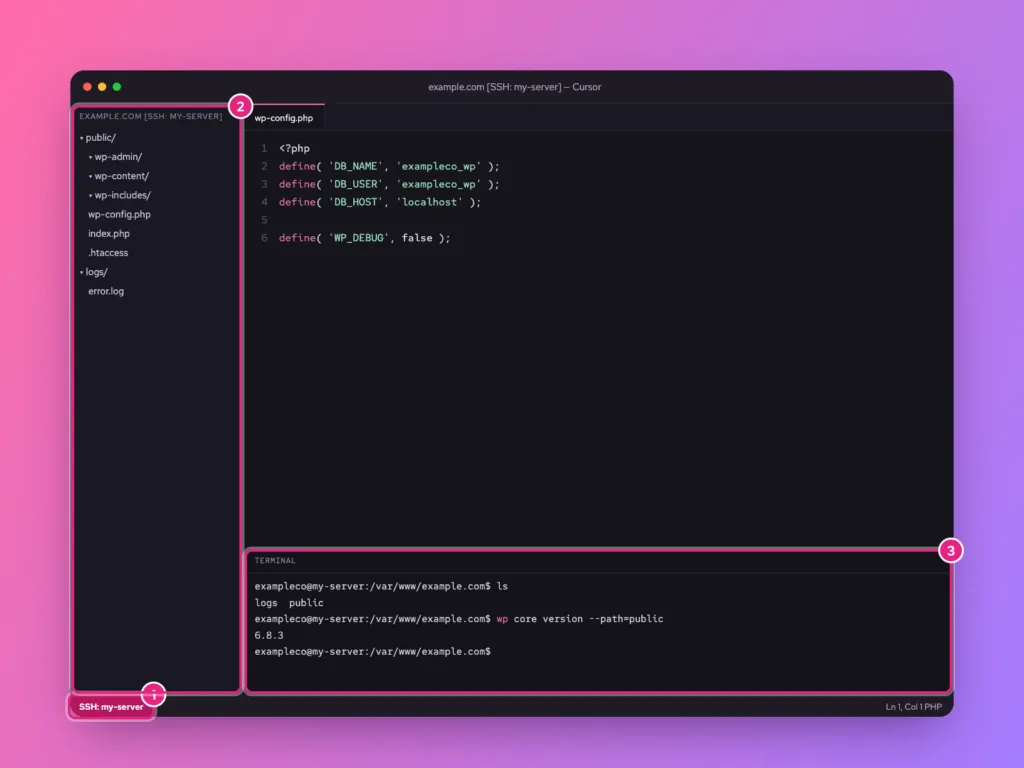
Cursor can open a folder on your server as if it were on your own computer. You browse the server’s files in the sidebar, edit them with Cursor’s AI, and run commands in a terminal that is already logged in to the server. It uses the same SSH connection you would use in a terminal, through the Remote-SSH extension.
Press Cmd+Shift+P (Ctrl+Shift+P on Windows and Linux) and run Remote-SSH: Connect to Host…. Choose Add New SSHSSH A secure way to type commands on a server from your own computer, as if you were sitting at it. More about SSH → Host…, type ssh user@your-server-ip, save it to your SSH config file, then connect and pick Linux. Once the bottom-left corner says SSH: your-host, use File › Open Folder to open the site folder on the server.
The pictures in this guide are illustrations of each step, drawn from Cursor’s real menu names. Your window will look slightly different depending on your theme and version.
Before you start
- Cursor installed on your computer, from cursor.com.
- A Linux server you can already reach with
ssh user@serverin a terminal. If not, start with how to connect to a server with SSH. - Ideally an SSH key rather than a password, so Cursor never has to ask.
- At least 1 GB of memory on the server. Cursor runs a small helper process there.
Test the plain SSH login first. If ssh exampleco@203.0.113.10 does not work in your terminal, it will not work in Cursor either, and the terminal shows clearer errors.
Step 1: Open the Remote-SSH command
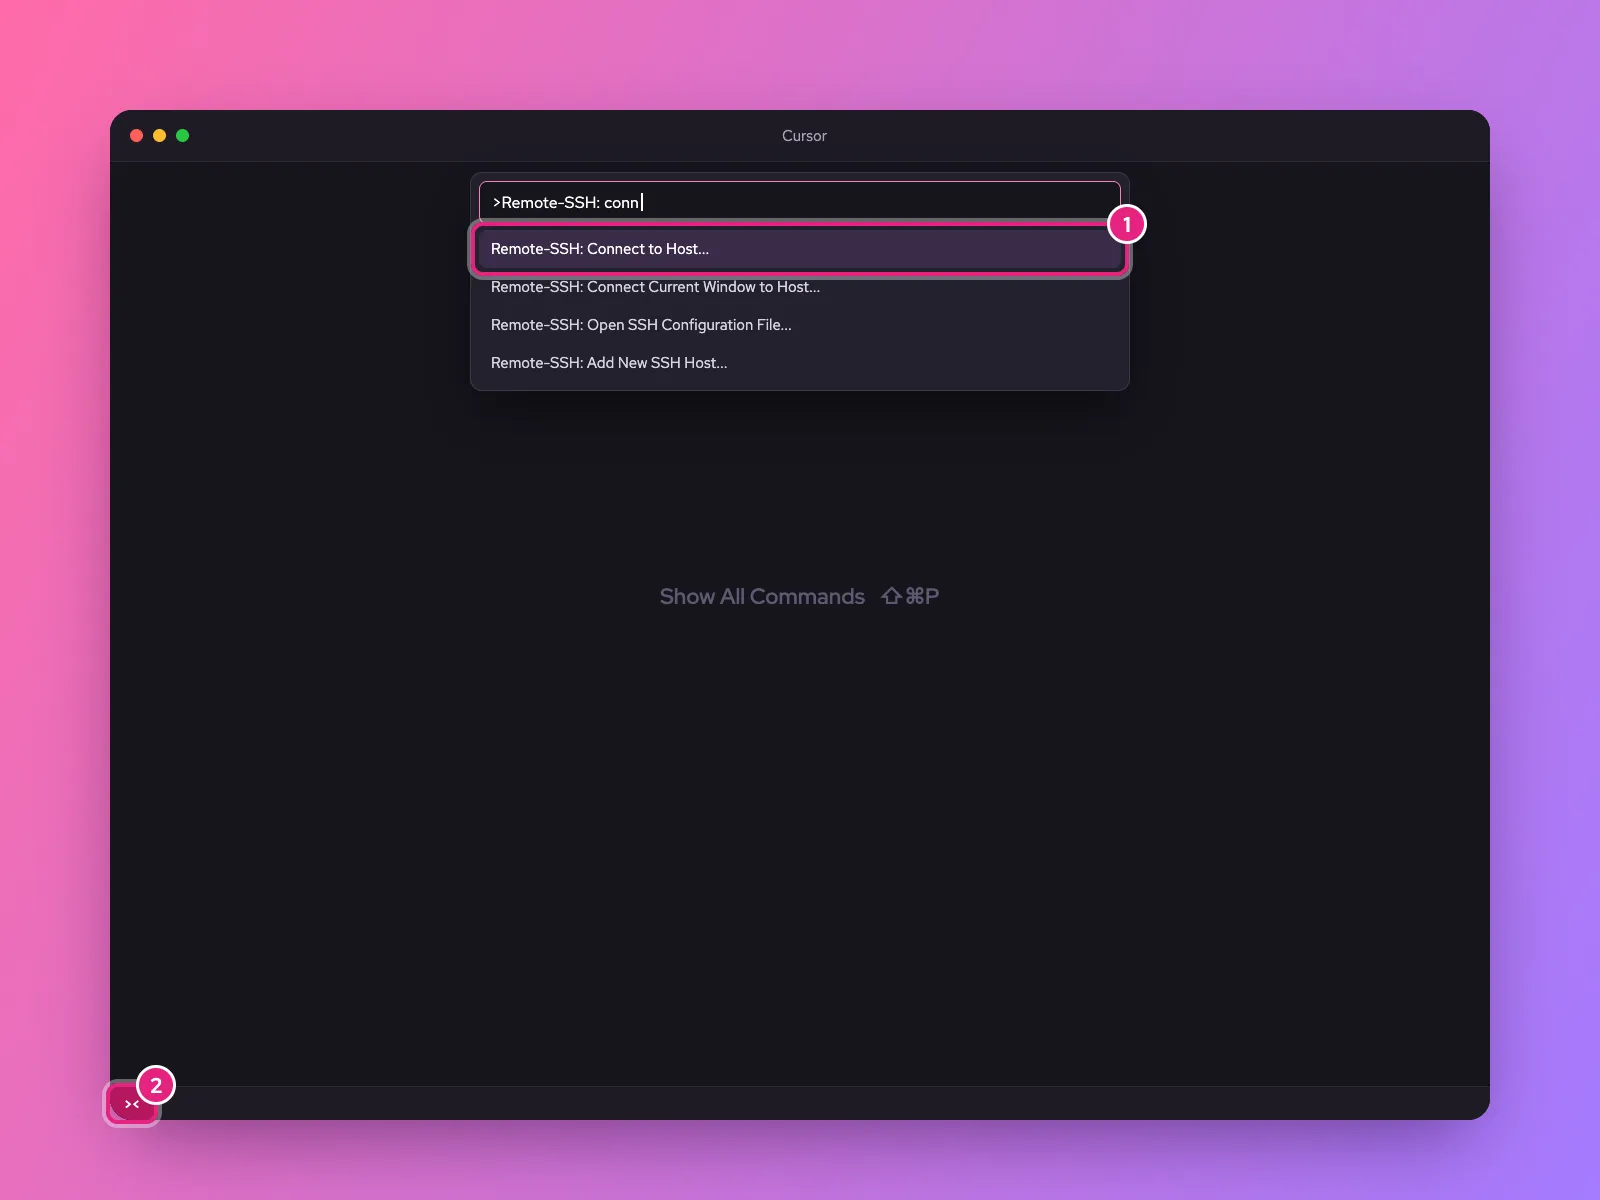
Press Cmd+Shift+P on a Mac or Ctrl+Shift+P on Windows and Linux to open the command palette, and type remote-ssh. Choose Remote-SSH: Connect to Host… (1). The small button in the bottom-left corner of the window (2) opens the same options.
If no Remote-SSH commands appear, open the Extensions view (Cmd+Shift+X), search for Remote – SSH and install it.
Step 2: Add your server
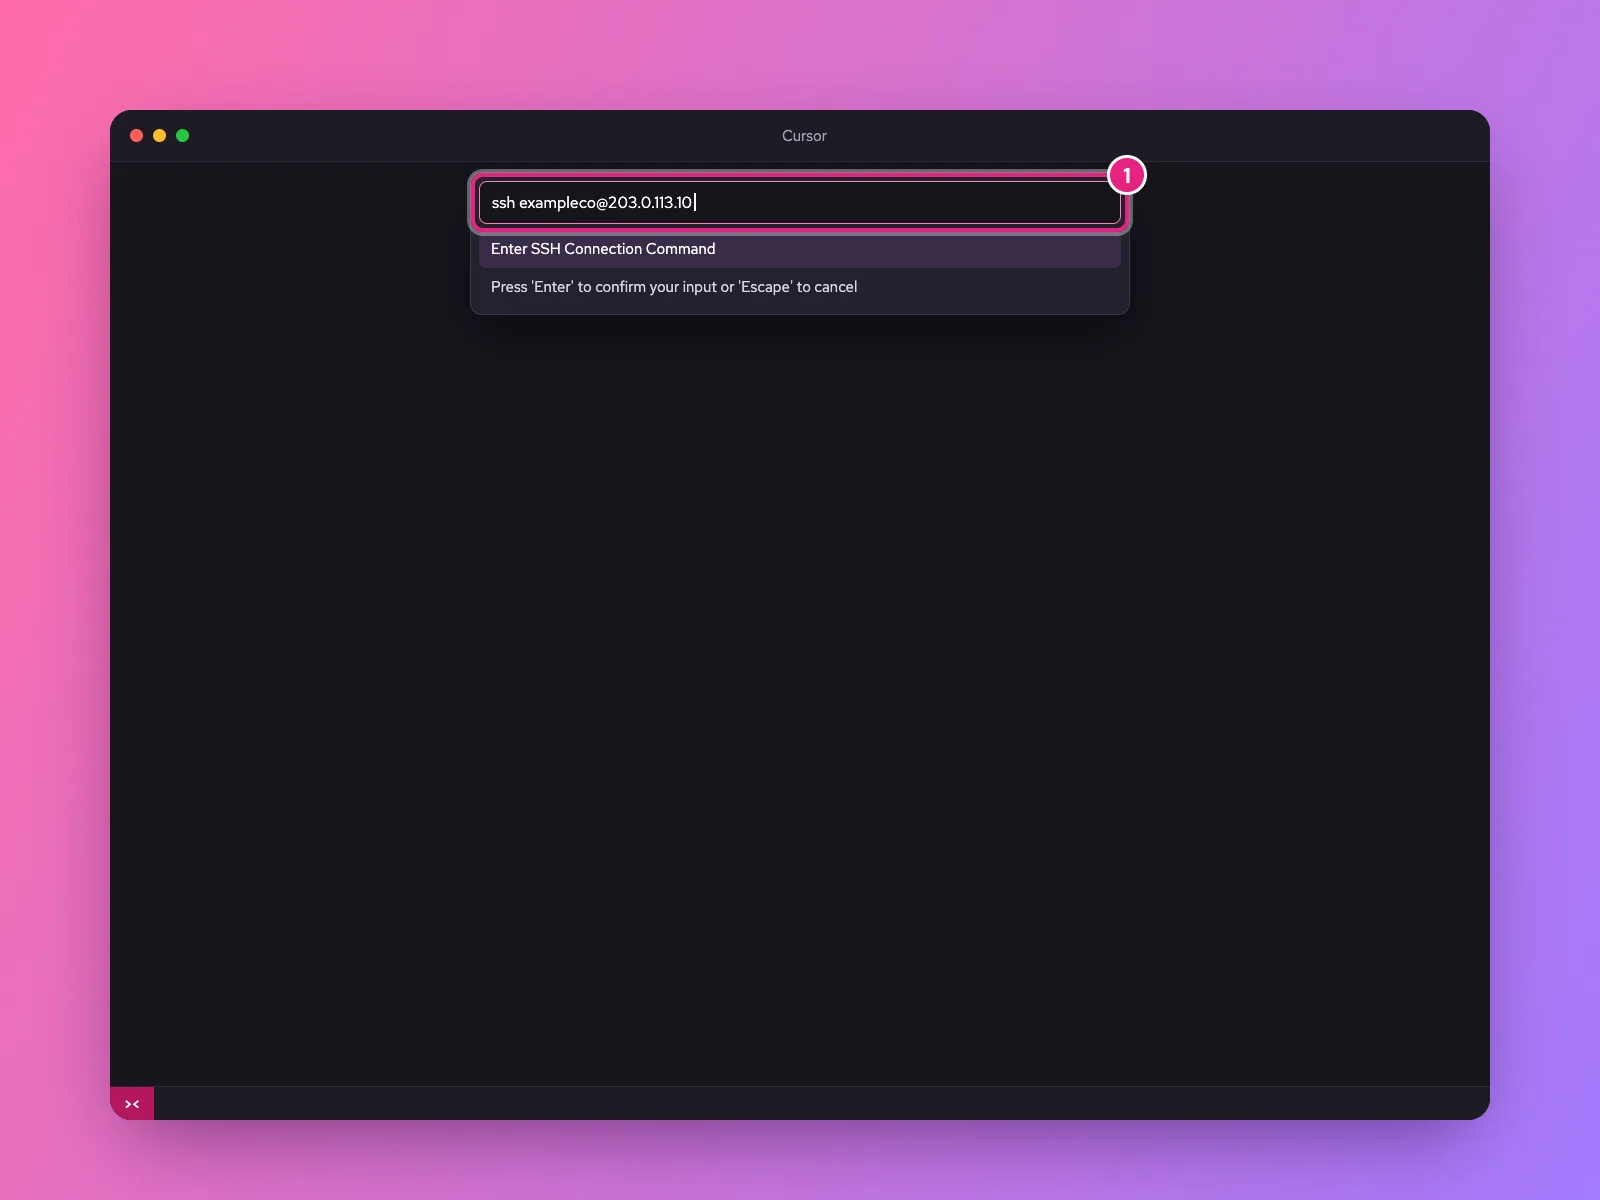
Choose + Add New SSH Host… and type the command you use in a terminal, such as:
ssh exampleco@203.0.113.10Add -p 2222 if your server’s SSH is on another portPort A numbered door on a server. Each service listens behind its own door: web pages on 443, email on others, remote login on 22. More about Port →. Cursor then asks which SSH configuration file to save it in. Pick the first one, which is your own: ~/.ssh/config on Mac and Linux, or C:\Users\you\.ssh\config on Windows.
Step 3: Give it a friendly name
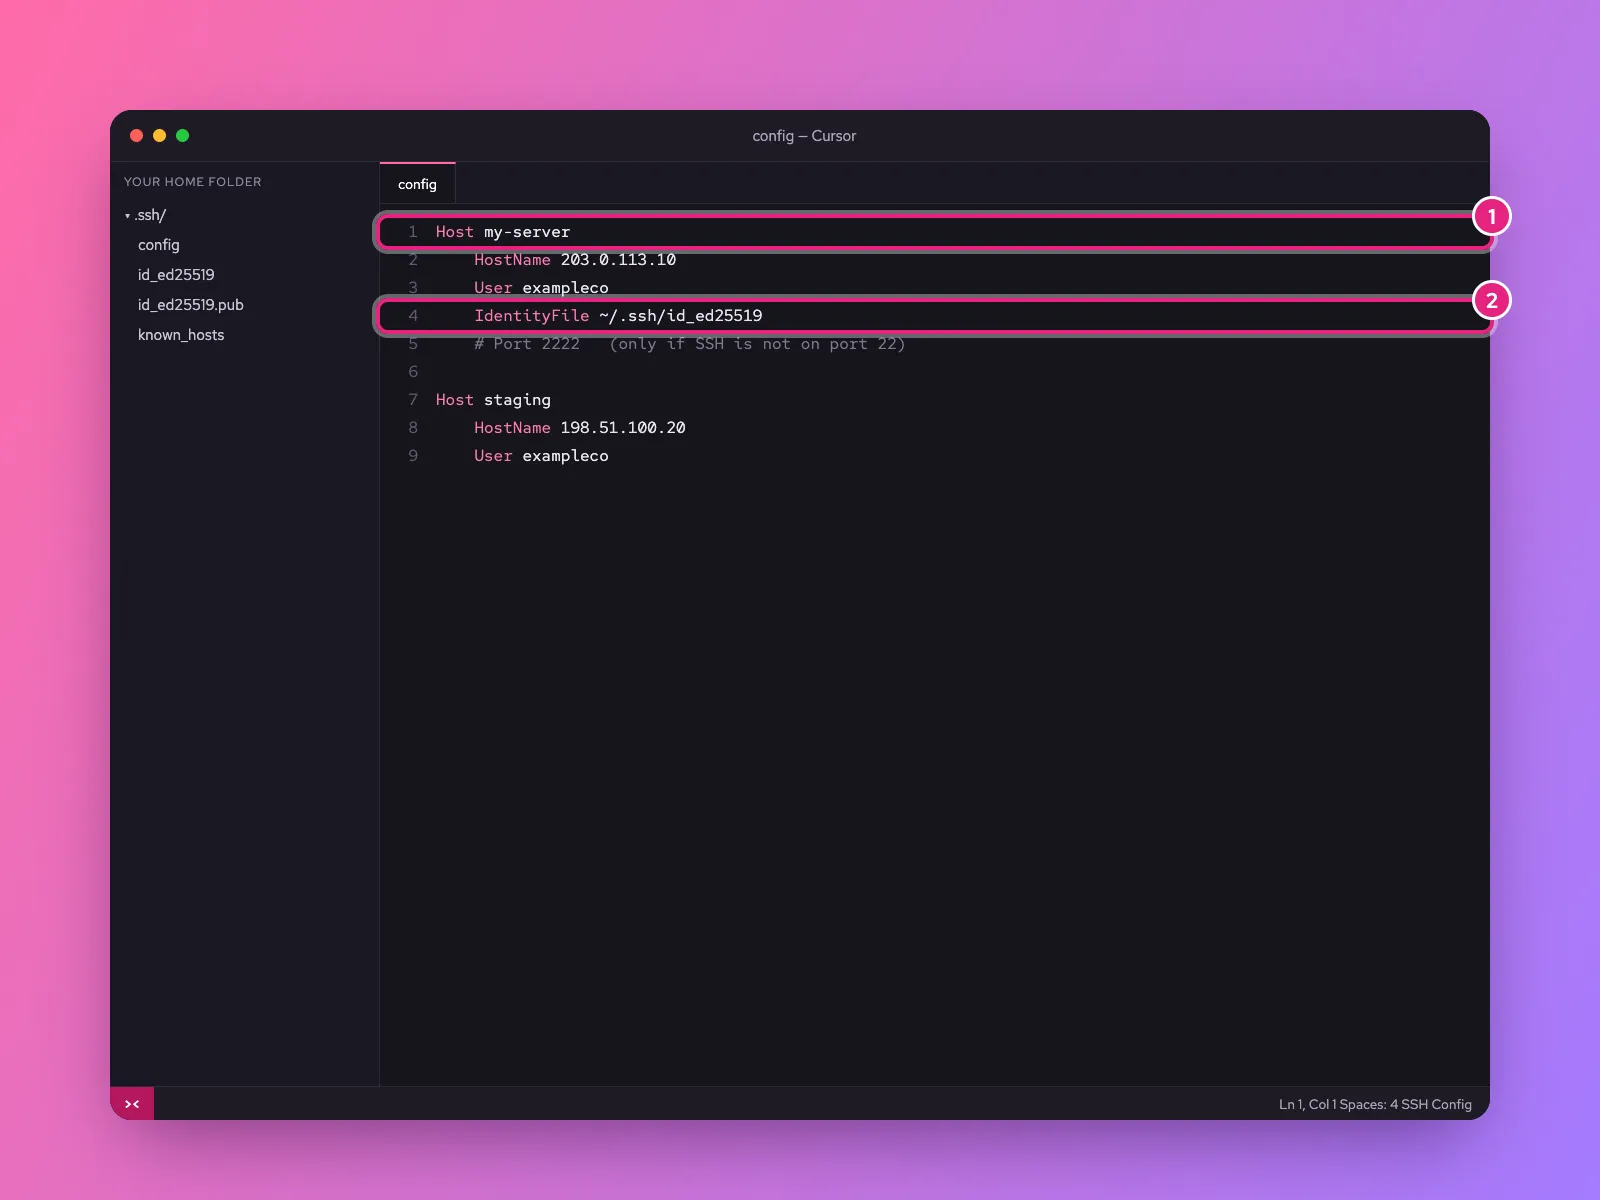
Run Remote-SSH: Open SSH Configuration File… to tidy the entry. A short name makes it easy to pick later:
Host my-server
    HostName 203.0.113.10
    User exampleco
    IdentityFile ~/.ssh/id_ed25519
The Host line (1) is the name Cursor shows. IdentityFile (2) tells it which key to use. Add Port 2222 if needed. The same file also works for the ssh my-server command in your terminal.
Step 4: Connect
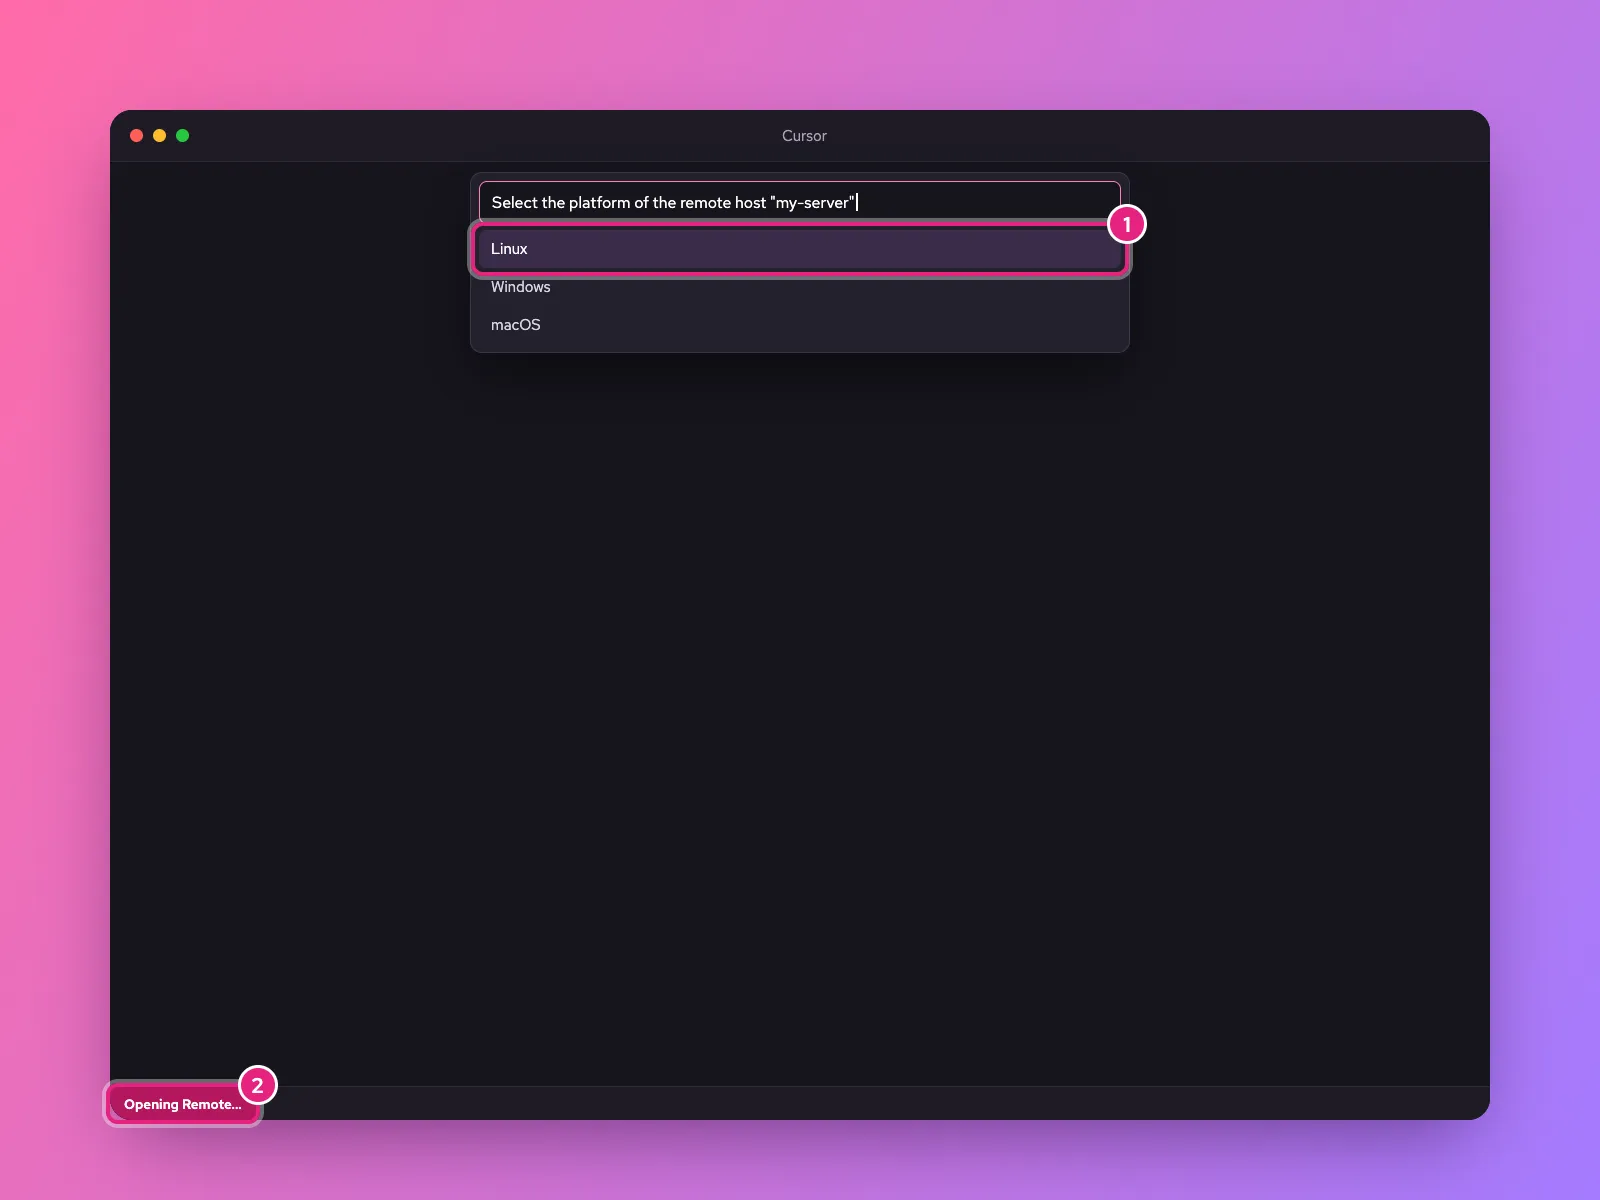
Run Remote-SSH: Connect to Host… again and pick my-server. A new window opens. The first time, Cursor asks:
- The platform of the server. Choose Linux (1).
- Whether to trust the host key. Check the fingerprint matches your server, then continue. It is saved to
known_hosts. - Your password or key passphrase, if you did not set up a key without one.
While it connects, the bottom-left corner shows progress (2). Cursor installs its helper on the server in ~/.cursor-server. This takes a minute the first time and a few seconds afterwards.
Step 5: Open your site’s folder
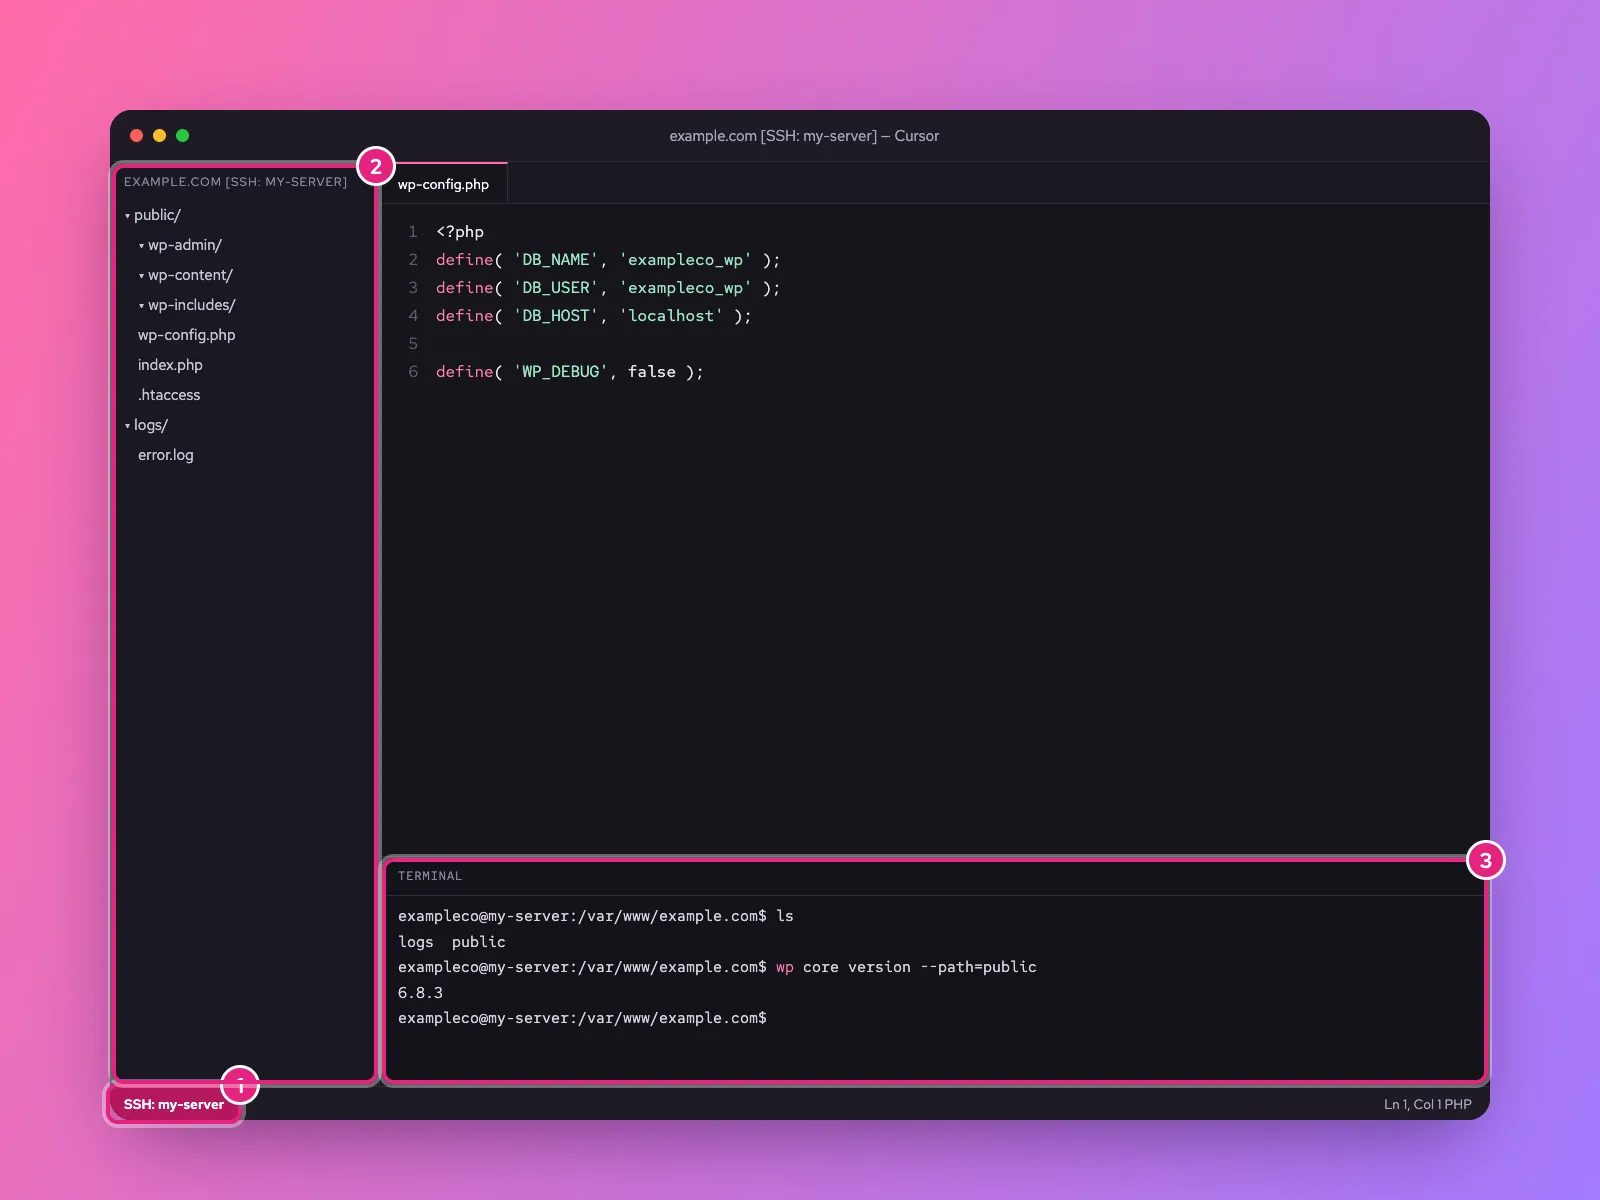
When the corner shows SSH: my-server (1), you are connected. Choose File › Open Folder and type the path of your site, such as /var/www/example.com/. Its files appear in the sidebar (2), and every file you open and save is the copy on the server.
Open a terminal with **Ctrl+** (the backtick key). It is already logged in to the server (3), in the folder you opened, so commands like ls, wp and systemctl` run there. Next time, File › Open Recent reopens the remote folder in one click.
Common problems
| What you see | Cause | Fix |
|---|---|---|
| Could not establish connection | SSH itself fails | Run ssh my-server in a terminal and fix that first |
| Permission denied (publickey) | Wrong user or key | Check User and IdentityFile; see SSH keys |
| Connection timed out | Firewall or wrong port | Open the SSH port; see firewalls and ports |
| Stuck on “Setting up SSH host” | Server cannot download Cursor’s helper, or the disk is full | Check df -h and outgoing internet access on the server |
| Disconnects or “The remote host may not meet requirements” | Server out of memory, or a very old Linux | Add swap or memory; use a current Ubuntu, Debian or AlmaLinux |
| Port forwarding errors | AllowTcpForwarding no in sshd_config | Set it to yes for your user and restart sshd |
| Can open files but not save them | File owned by another user | Connect as the site’s user, or fix ownership with chown |
To start again from a clean state, delete ~/.cursor-server on the server and reconnect.
Stay safe on a live server
Editing over SSH changes the live site the moment you save. Before you let Cursor’s AI change anything, take a backup, and keep your changes in Git so you can undo them. The workflow is in how to edit a WordPress site with Cursor.
Related
Something out of date? Software changes. If a step no longer works, tell us and we will check it and update the page.