cPanelcPanel The most popular hosting control panel: a website where you manage your email, files, databases and domains with point-and-click tools instead of commands. More about cPanel →’s Zone Editor edits your domain’s DNSDNS The internet’s phone book. It turns a name people can remember, like example.com, into the number address computers use to find the server. More about DNS → records: where the website points, where email is delivered, and the TXT records that verify services and protect your email. Before editing anything, make sure the changes will actually count.
Open Domains » Zone Editor and click Manage next to the domain. Use Add Record for a new record, or Edit on an existing row. Changes only take effect if the domain’s nameserversNameserver The server that holds all of a domain’s settings. Whoever runs your nameservers controls where your website and email point. More about Nameserver → point at this server; check with dig NS example.com +short.
First: does cPanel control your DNS?
The Zone Editor always shows a zone, but the internet only reads it if your domain’s nameservers belong to this host. If your domain uses Cloudflare, your registrarDomain registrar The company you buy and renew your domain name from, and where you choose who handles its settings. More about Domain registrar →’s DNS, or another provider, edit records there instead; changes made in cPanel are ignored.
Check from any computer:
dig NS example.com +shortIf the answer names your host’s nameservers (often ns1.your-host.com), cPanel is in charge. The Zone Records page also shows Configured nameservers for this zone at the top. See what a nameserver is.
The domain list
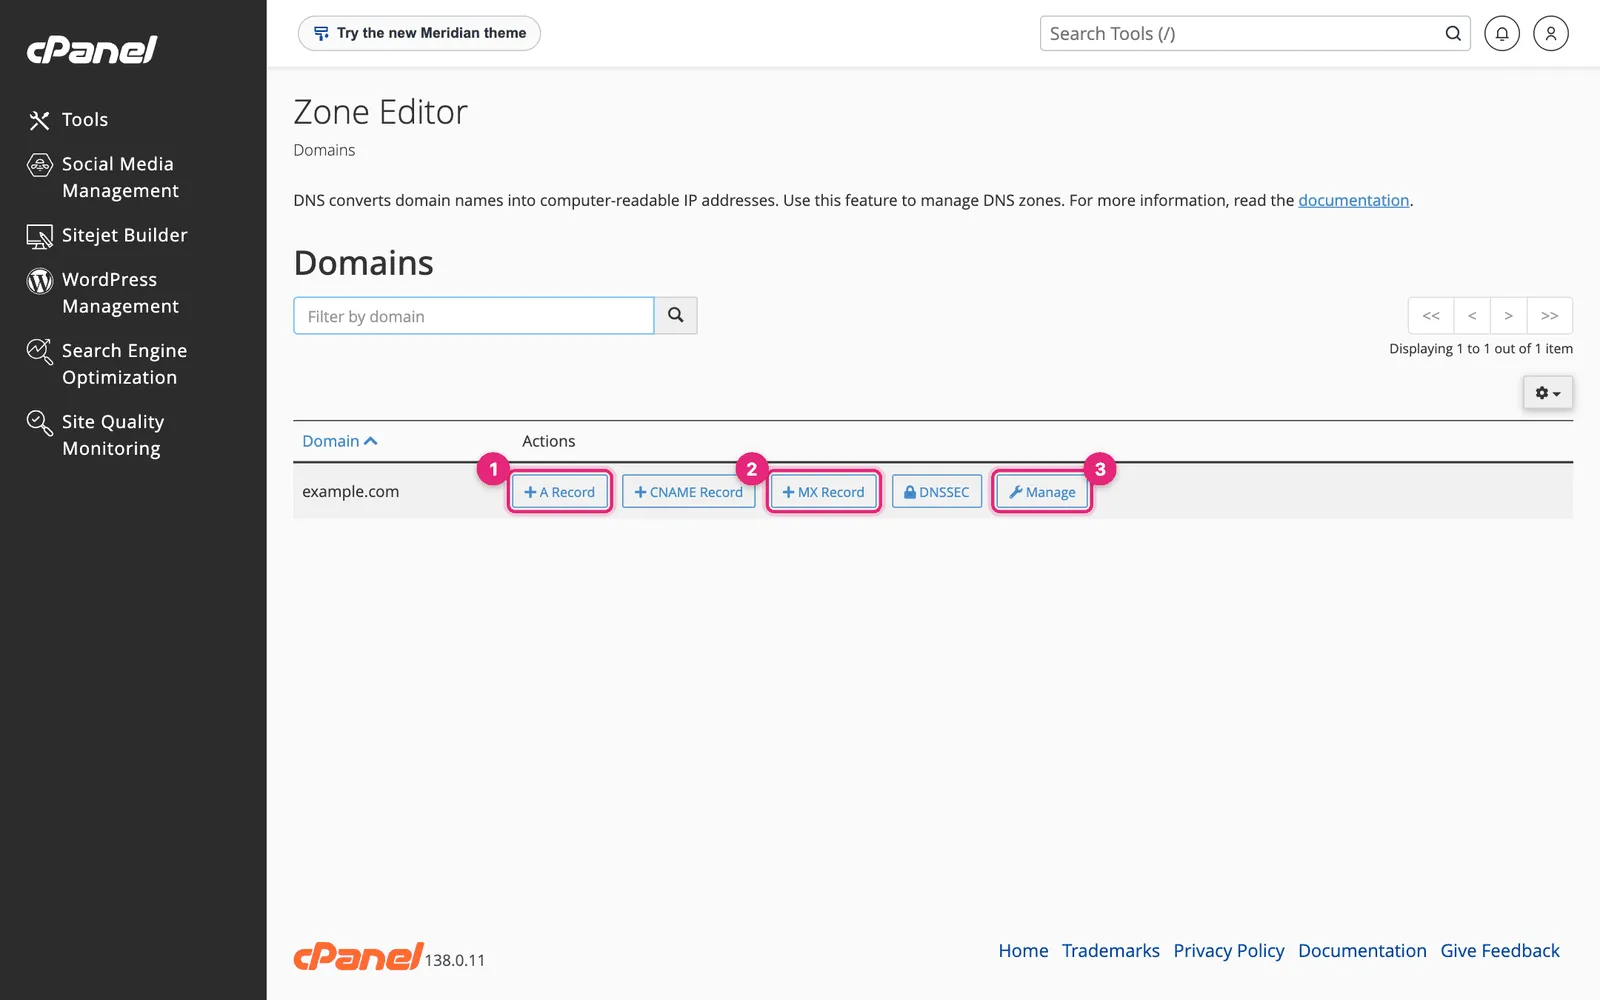
- + A Record adds an address record in one step.
- + MX Record adds a mail server.
- Manage shows every record in the zone.
The zone records
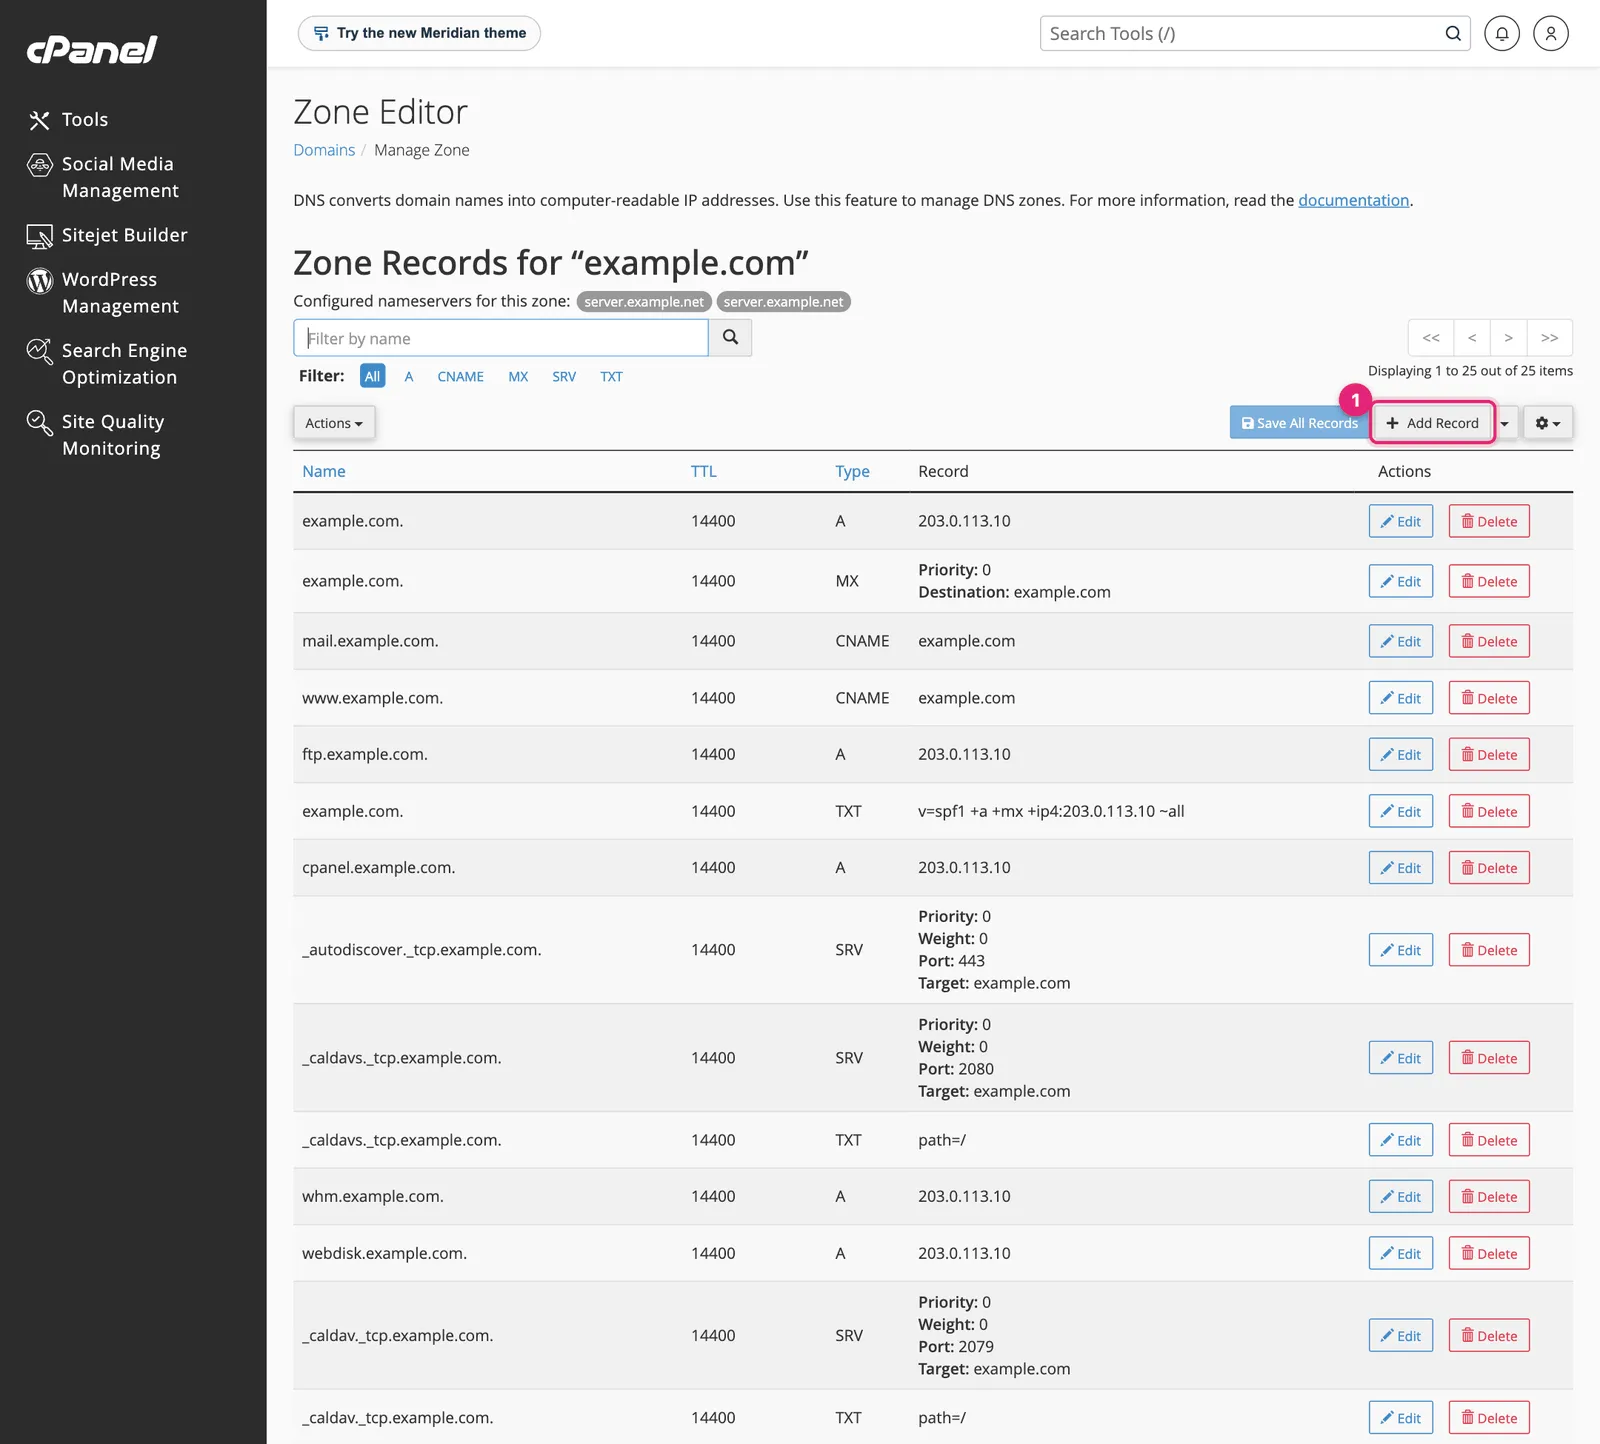
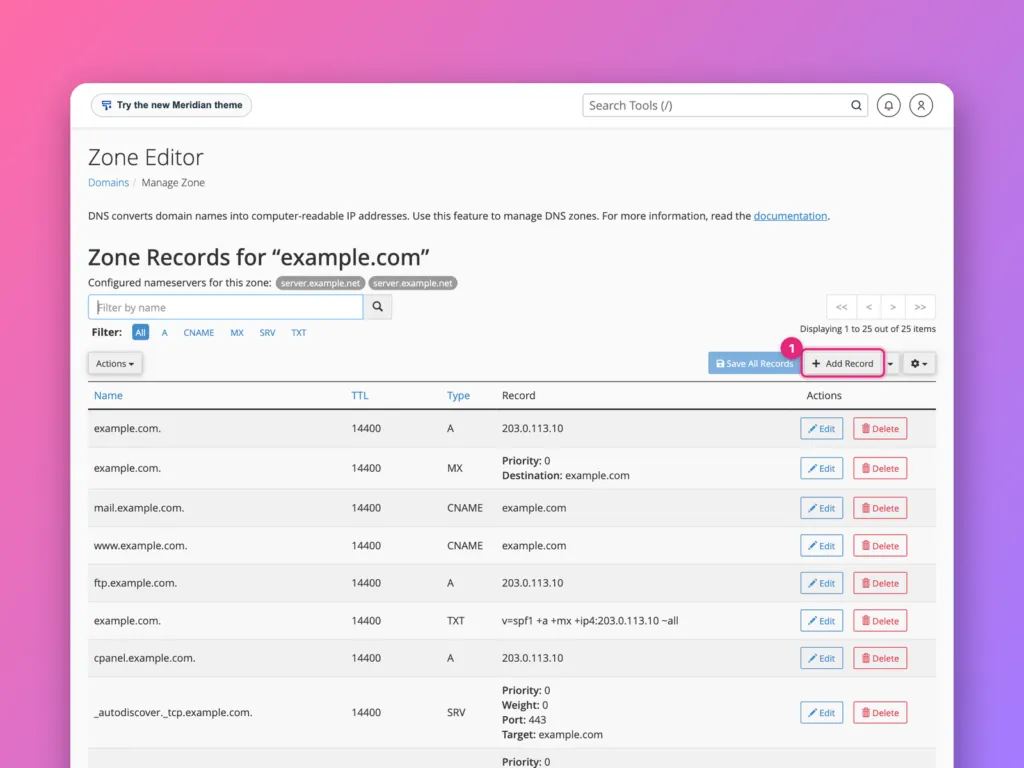
A new cPanel account comes with records already in place: the domain and www, mail, ftp, the cpanel and webmail shortcuts, an SPFSPF A list you publish saying which services are allowed to send email for your domain. Mail from anywhere else looks suspicious. More about SPF → record, and SRV records that let mail apps set themselves up. Leave the ones you do not recognise alone; most exist for cPanel’s own features.
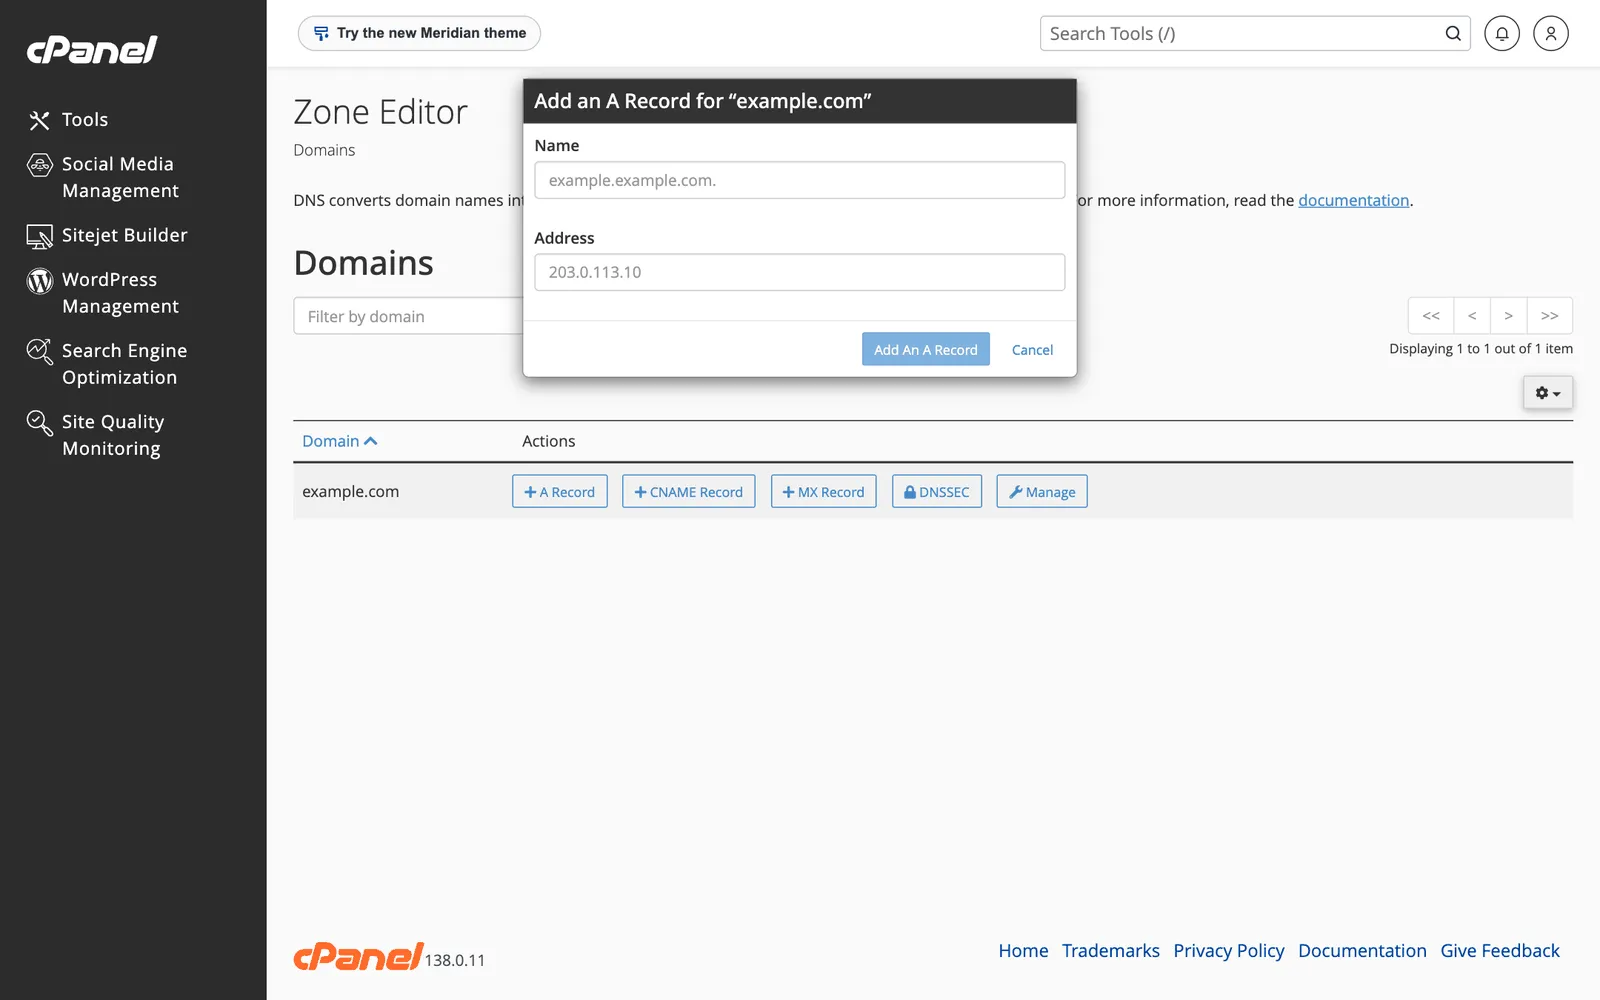
Add a record
Click Add Record (or + A Record on the domain list):
| To do this | Type | Name | Value |
|---|---|---|---|
| Point a subdomain at another server | A | shop.example.com. | The server’s IP address |
| Make a subdomain an alias | CNAME | docs.example.com. | target.provider.example. |
| Verify a service | TXT | As the service says | The verification string |
| Use an outside mail provider | MX | example.com. | The provider’s mail server, with its priority |
Names end with a dot because they are full hostnames. Type the name in full, such as shop.example.com, and cPanel adds the dot. The record types are explained in DNS record types.
Edit or delete
Use Edit on a row to change its value or TTLTTL How long other computers may remember a domain setting before checking again, in seconds. Short means changes show up faster. More about TTL →, then Save Record. Delete removes it after a confirmation. To find a record quickly, type in Filter by name or click a type such as MX.
Moving email to Google Workspace or Microsoft 365
Do it in this order, so no mail is lost:
- Add the provider’s verification TXT recordTXT record A domain setting that holds a line of text. Services use it to check you own the domain, and email uses it for SPF, DKIM and DMARC. More about TXT record → and wait for them to confirm.
- Under Email » Email Routing, set the domain to Remote Mail Exchanger, so this server stops accepting mail for it locally.
- In the Zone Editor, delete the old MX recordMX record The domain setting that tells the world where to deliver your email. More about MX record → and add the provider’s.
- Update the SPF TXT record to include the provider, and add their DKIMDKIM A digital signature added to every email you send, so the receiving side can check it really came from your domain and was not changed. More about DKIM → record.
Skipping step 2 is a common mistake: the server keeps delivering mail from its own websites, such as contact forms, into the old local mailbox.
Changes and propagation
Records here use a default TTL of 14400 seconds (4 hours). A change can take that long to reach everyone. Before planned changes, lower the record’s TTL to 300 a day ahead. See what DNS propagation is.
Official documentation
- Zone Editor, cPanel documentation.
Related
Something out of date? Software changes. If a step no longer works, tell us and we will check it and update the page.