cPanelcPanel The most popular hosting control panel: a website where you manage your email, files, databases and domains with point-and-click tools instead of commands. More about cPanel → servers include at least one WordPress installer. Most now ship WP Toolkit, shown as WordPress Management; many also have Softaculous. Both create the database, user and files for you in a minute.
Open WordPress Management (WP Toolkit), click Install WordPress, choose the domain and leave the directory empty to install at the domain’s root, set an admin username, password and email, and click Install. Log in from the toolkit’s Log in button.
Before you start
- The domain should already point at the server if you want HTTPSHTTPS The secure version of the web, shown by the padlock. Everything sent between you and the site is scrambled so nobody in between can read or change it. More about HTTPS → to work straight away. You can install first and add the certificate later. See SSL in cPanel.
- If the domain already has files in its folder, such as a holding page, the installer may refuse or ask to overwrite them. Back them up first.
1. Open the installer
Go to Domains » WordPress Management, or the WordPress icon in the left sidebar. With no sites yet, you see Install WordPress and Scan. Scan finds WordPress sites installed earlier by hand, so the toolkit can manage them too.
2. Choose the options
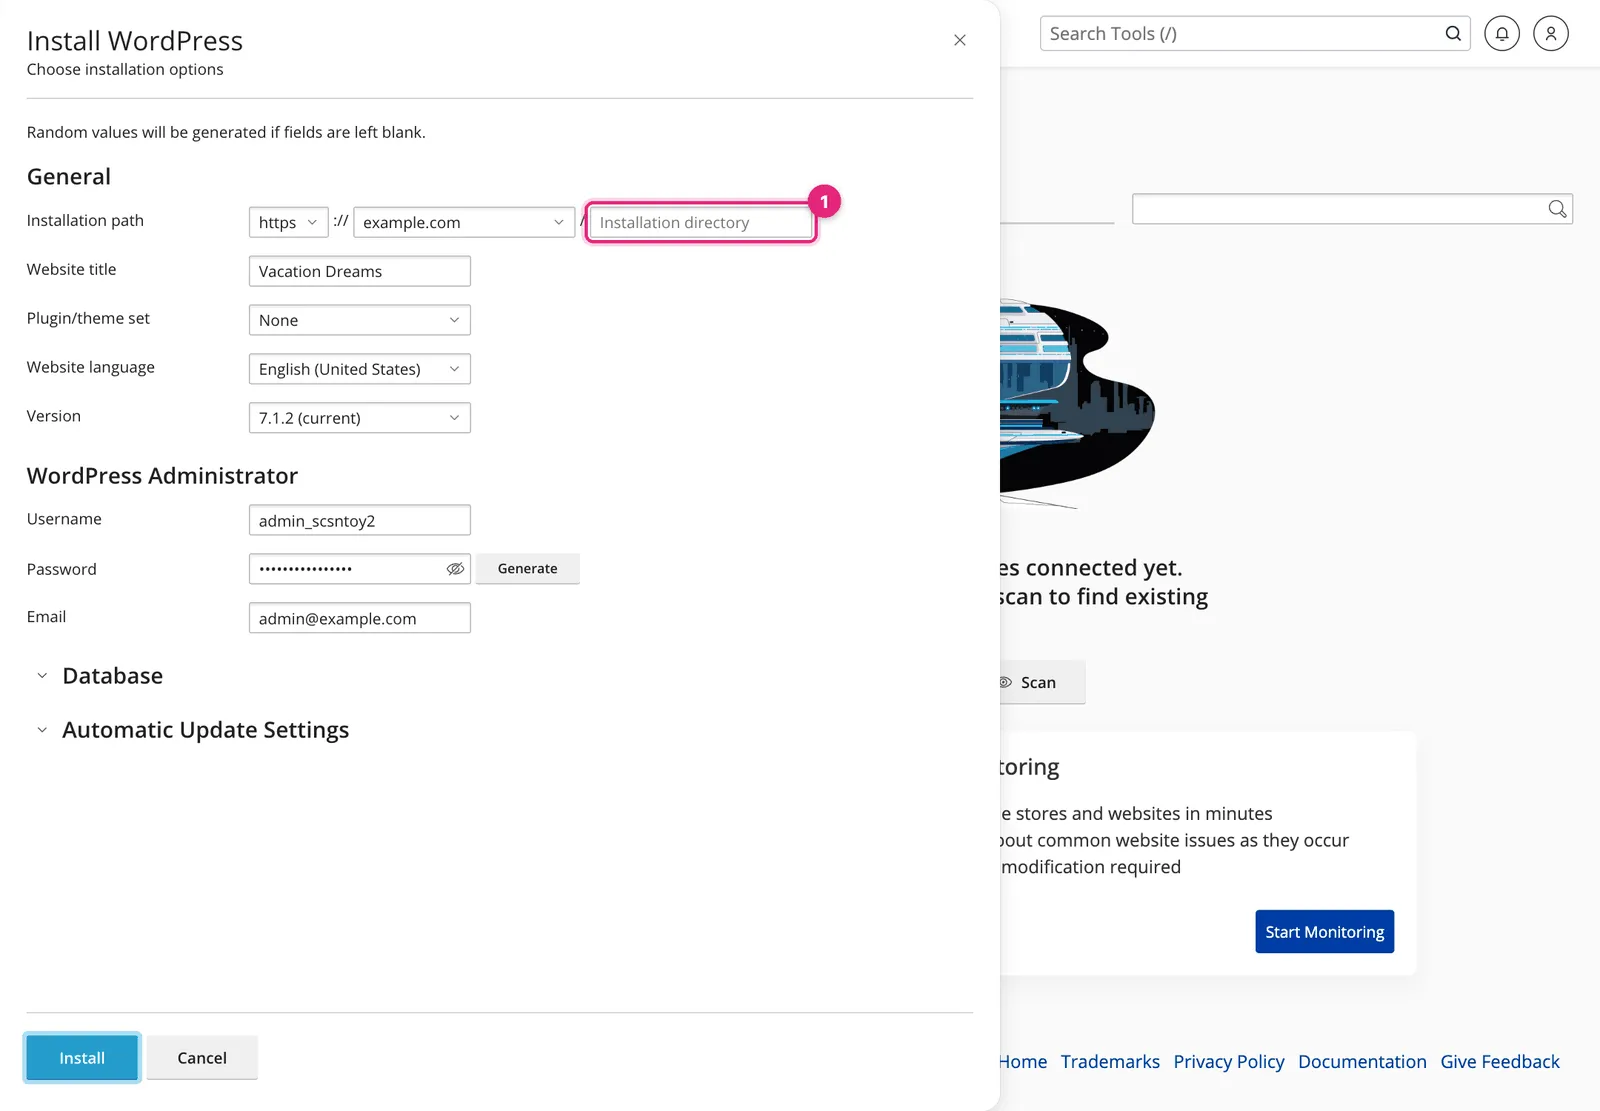
General
| Field | What to choose |
|---|---|
| Installation path | https, your domain, and the directory. Leave the directory empty for example.com, or type blog for example.com/blog |
| Website title | Your site’s name; you can change it later |
| Plugin/theme set | None unless your host offers a set you want |
| Website language | The language of the admin area and default text |
| Version | The latest, unless a theme or plugin needs an older one |
WordPress Administrator
- Username: avoid
admin; it is the first name attackers try. The generated one is fine. - Password: click Generate and save it in a password manager.
- Email: a mailbox you read. Password resets and update notices go here.
Under Database, the toolkit picks a database name, user and table prefix. The defaults are fine. Under Automatic Update Settings, turning on automatic minor and security updates is a safe choice for most sites.
Click Install. It takes under a minute.
3. Manage the site
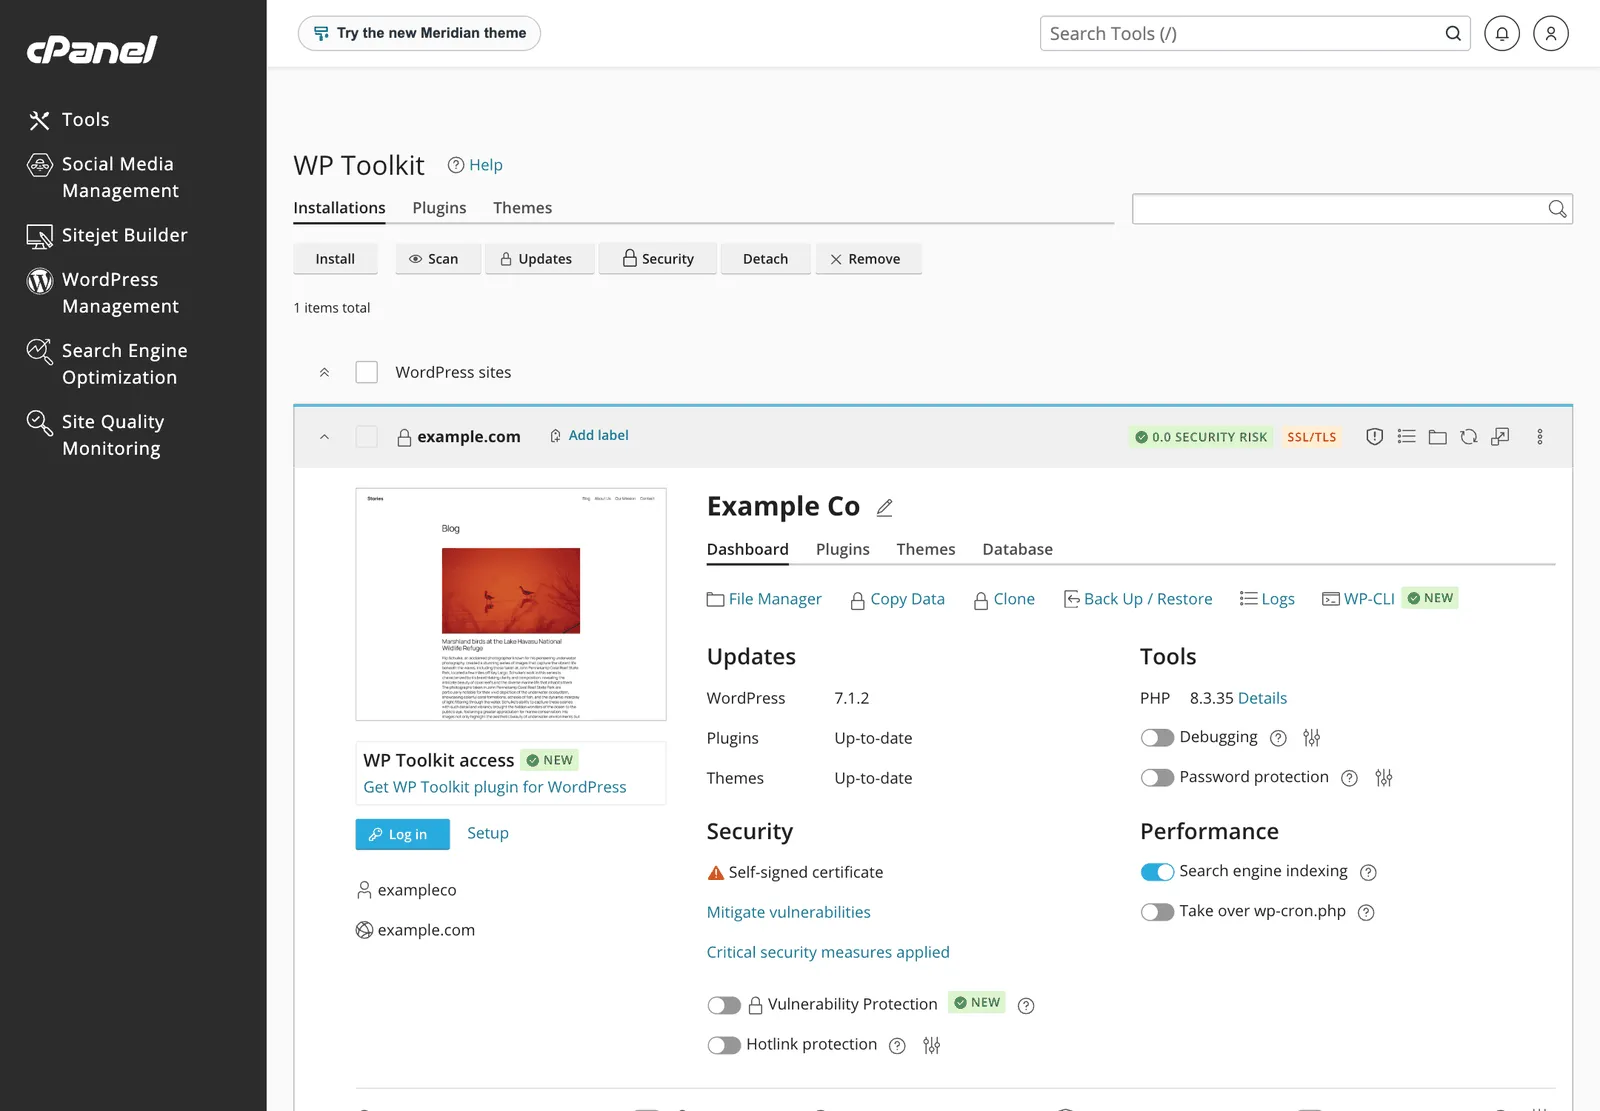
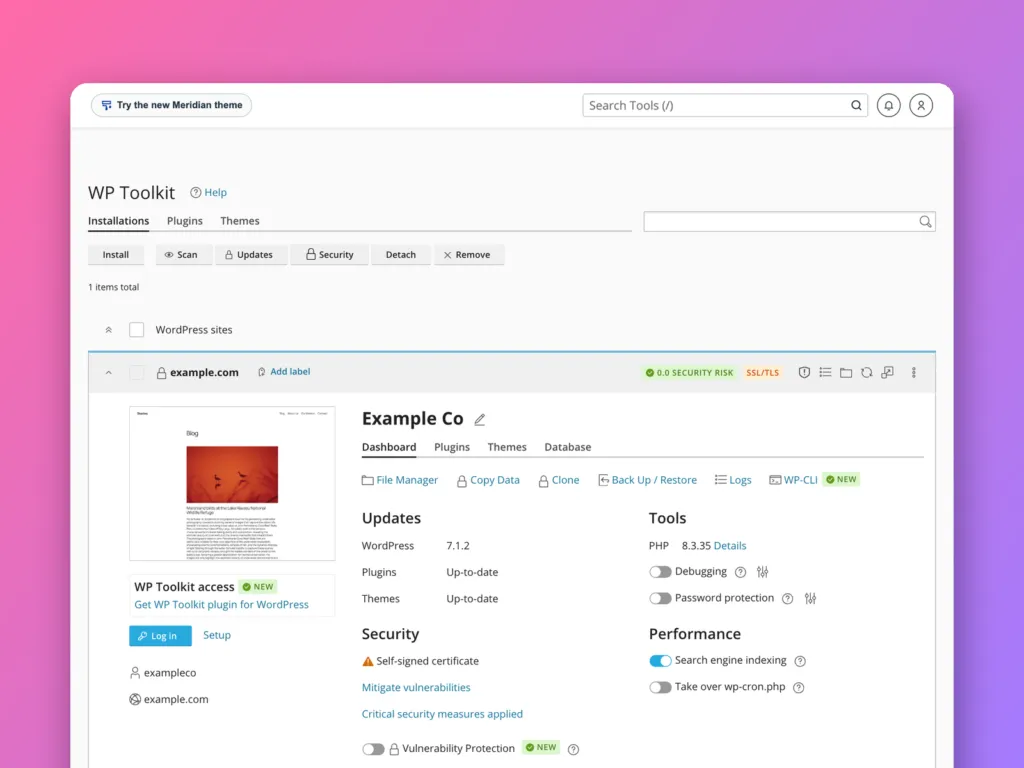
Each installed site gets a card with everything in one place:
- Log in opens the WordPress admin without typing a password.
- Back Up / Restore takes a snapshot before risky changes.
- Clone copies the site, for example to a staging subdomainSubdomain A name in front of your domain, like shop.example.com or blog.example.com. It can show a different site from the main one. More about Subdomain →, and Copy Data pushes changes back.
- Updates shows core, plugin and theme updates.
- Security applies recommended hardening, such as blocking direct access to sensitive files.
- Search engine indexing should stay on for a live site and off for a staging copy.
- Take over wp-cron.php replaces WordPress’s visitor-triggered scheduler with a real cron jobCron job A task the server runs by itself on a timetable, like an alarm clock for jobs. For example, making a backup every night at 3 a.m. More about Cron job →, which makes scheduled posts and backups run on time on quiet sites. See cron jobs in cPanel.
The warning Self-signed certificate on this demo appears because the domain does not point at the server. On a real domain, AutoSSL replaces it with a trusted certificate within a few hours.
Using Softaculous instead
Software » Softaculous Apps Installer » WordPress » Install Now opens a similar form: protocol, domain, directory, site name, admin account and plugins. One catch: on some servers the free edition of Softaculous shows “WordPress cannot be installed in the Free version”. If you see that, use WP Toolkit, which does the same job.
After installing
- Log in and check Settings » General shows
https://addresses. - Delete the sample post, page and unused themes.
- Set Settings » Permalinks to “Post name” for readable addresses.
- Install a cachingCache A saved copy of something, kept so it does not have to be made or fetched again. Like keeping a printed copy instead of reprinting it for every person who asks. More about Cache → plugin, or turn on your host’s cache. See what caching is.
- Make sure backups are running. See backups in cPanel.
If it fails
| Problem | Fix |
|---|---|
| The domain is not in the list | Add it first under Domains. See domains in cPanel |
| “Directory is not empty” | Move or delete the existing files, or choose a subdirectory |
| Site shows a certificate warning | The domain does not point here yet, or AutoSSL has not run |
| Error establishing a database connection after moving | Database details in wp-config.php do not match |
Related
Something out of date? Software changes. If a step no longer works, tell us and we will check it and update the page.